Sharing your essential oil recipes with your friends just got easier! Make Breaks has a collection of gorgeous free printable recipe cards you can use to share recipes for personal care products, cleaning supplies, DIY diffuser blends, and more. This would be a wonderful page to bookmark if you’re working on any homemade Christmas gifts for family and friends.
Cold and flu season is officially here, but you don’t have to suffer in silence. If you’re feeling congested, these easy DIY shower steamers are the perfect way to help you breathe more easily.
Supplies
1 cup baking soda
¼ cup distilled water
10 drops peppermint essential oil
10 drops eucalyptus essential oil
10 drops tea tree essential oil
Silicone ice cube molds
Mason jar or another airtight container
Instructions
Add ¼ cup distilled water to baking soda. Mix until the consistency of wet sand, adding a few additional teaspoons if needed.
Add essential oils. Mix well.
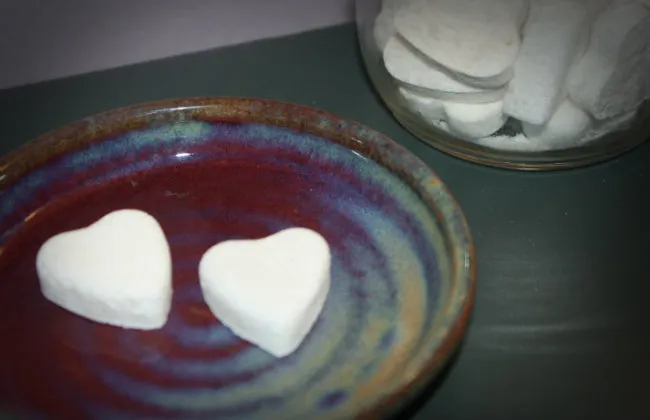
Press mixture into ice cube molds, packing firmly. The exact number of shower steamers you’ll get will vary according to the size and shape of your mold, but I was able to get about 24 steamers from my project.
Allow your steamers to dry for about 24 hours, then remove them from molds and store them in an airtight container.
To use your shower steamers, place one in the corner of your shower. It will slowly dissolve as you shower, releasing the congestion-fighting essential oils and allowing you to breathe more clearly. You’ll maximize the benefits if you use hot water and keep your bathroom door closed while you’re showering.
Diffuser necklaces are one of my favorite ways to enjoy the benefits of essential oils. I have several necklaces that I’ve purchased, but recently I decided to try making a few DIY additions to my collection. This project is super easy and can be customized to fit your unique sense of style.
Supplies
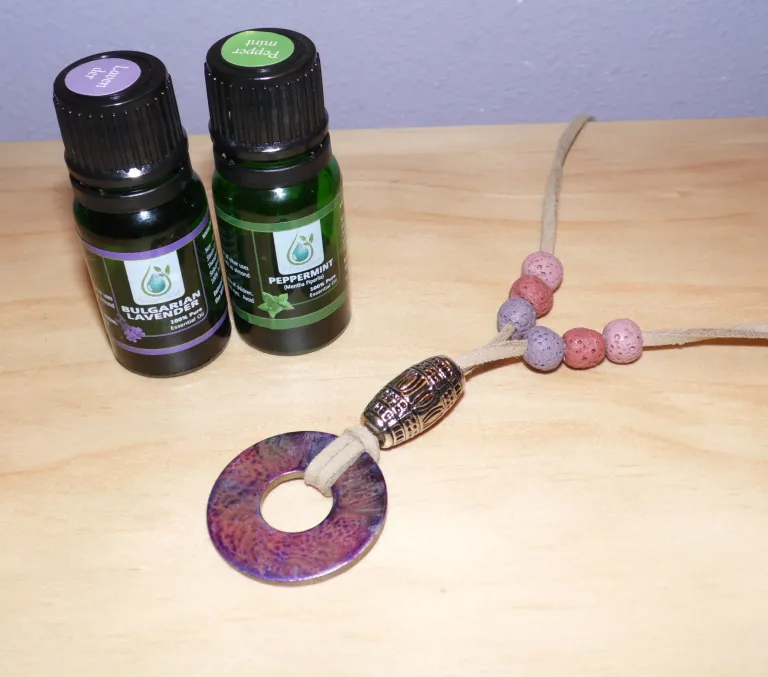
Lava beads: The lava beads are what will diffuse the scent of your oil. Black lava beads are easy to find at pretty much any craft store, but the colored ones are a little trickier. The ones I’m using for this project are part of a multicolored strand from Bead Nova. The 10 mm size is easy to work with and all the different colors mix and match really well.
Focal bead: The metal beads I used were in my craft stash from years ago. Anything with a similar size or shape would work. I think wood beads would be really pretty if you like jewelry with more of a rustic look.
Washer: I stole these from hubby’s toolbox in the basement, but you can buy them dirt cheap at them at the hardware store if you need to.
Faux suede cord: This cord is awesome for diffuser necklaces because it complements the natural look of the lava beads. Also, if you add a drop of oil to the cord, it will hold the scent almost as well as your lava beads. The cord I used is from Bead Nova. It comes in four different colors and with four free necklace extenders. This is enough to make at least eight diffuser necklaces, maybe more.
Alcohol ink: I love all the pretty colors in the Ranger brand. I had the best results using two colors per washer–one light and one dark.
Felt: You’ll use the felt as a stamp pad for your alcohol ink, so you need a scrap that’s slightly bigger than your washer. It doesn’t matter what color.
Clear nail polish: This is to seal your finished washer.
Newspaper and rubber gloves: Alcohol ink is messy, so I’d suggest being careful not to mess up your workspace.
Instructions
Lay newspaper on your work surface and put on the rubber gloves. Put your washer face down on the paper.
Drop two to four drops of each color of alcohol ink on your felt square. Gently stamp the colors on the washer. They should blend together to create a soft watercolor effect.
When the alcohol ink is dry, apply a coat of clear nail polish to the washer to seal it. This will make your colors run together a bit, but that should only add to the pretty pattern you’ve created. (Alternatively, you could try using a clear acrylic sealer if you have one on hand. Since I’m all about saving money, I try to craft with what I have available!)
Tie the washer to your necklace. Hold your cord so that each end is even and make a loop in the middle. Thread this loop through the center of the washer, then wrap the two ends around the washer before threading them through the loop.
Add your focal bead.
Add three lava beads to each side of the focal bead. I used three different coordinating colors to pick up the tones in my washer.
Add a knot to close the ends of your necklace. I made an adjustable sliding knot for my necklaces so I could wear them with several different shirts in my wardrobe. There’s a great tutorial for this type of knot over at Jewelry Making Journal. I’d suggest that you practice on some old yarn until you have it figured out since it took me a few tries to get the hang of it.
Add a drop or two of essential oil to your lava beads. Let the oils absorb a minute or two to avoid staining your clothes, then enjoy your pretty new necklace.
Essential Oil Suggestions
You can use whatever essential oils you’d like on your new diffuser necklace, but I’m a fan of peppermint for keeping headaches under control and lavender for stress relief.
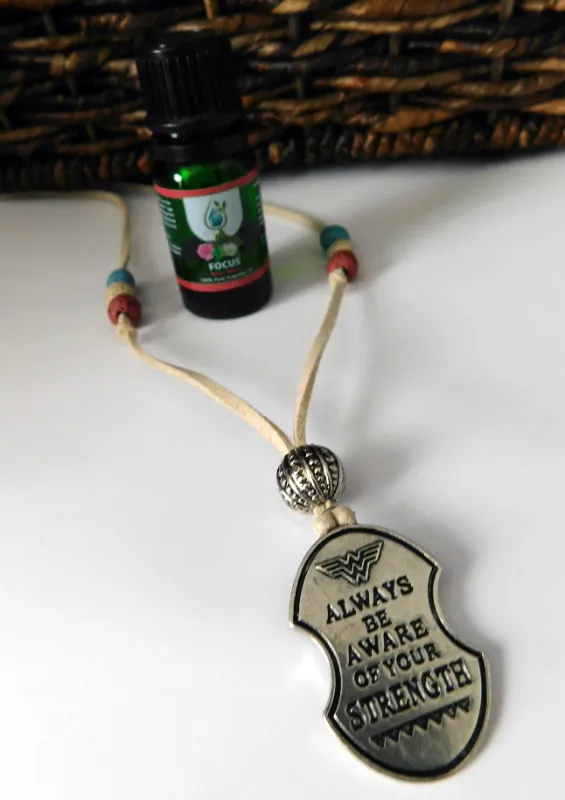
As far as I’m concerned, the only thing better than diffuser jewelry is diffuser jewelry that reflects your own unique personality. That’s why I’m so excited about my new DIY Wonder Woman diffuser necklace.
If you’re a DC comics fan, Hobby Lobby has a line of jewelry pendants and accessories that you’ll definitely want to check out. They’re called Pop Age Timeline by Bead Treasures and are manufactured by the Cousin Corporation.
Select items are available online, but I found a much better selection in store. There are several items featuring Wonder Woman, Superman, Batman, Joker, and Harley Quinn. Pick up ones for your favorite character or mix and match to give yourself plenty of options to choose from!
Here’s how I made my own Wonder Woman diffuser necklace.
Cut cord to the desired length. I cut mine to be about 30 inches long. Click here for a chart to help you decide how long you want it to be.
Add your pendant to the necklace. Hold your cord so that each end is even and make a loop in the middle. Thread this loop through the center of the pendant, then wrap the two ends around the pendant before threading them through the loop.
Add a silvertone bead, threading both ends of the suede cord through the bead.
Tie a small knot about three inches up the left side of the necklace, then add red, white, and blue lava beads. The beads I used are somewhat muted compared to the shades traditionally associated with Wonder Woman’s costume, but I thought they complimented my beige suede cord nicely. Repeat on the right side. (The knot keeps the beads from sliding down your necklace while you’re wearing it.)
Tie the suede cord together with an adjustable sliding knot. I love this method of finishing casual necklaces because it lets you adjust the length according to the neckline of whatever top you’re wearing. However, you could add the clasp of your choice if that’s what you prefer.
Add oil to your lava beads and enjoy. Wonder Woman has a ton of items on her to-do list, so I’m using Jade Bloom’s Focus blend on my necklace. This blend of spearmint, Spanish sage, geranium, German chamomile, and myrtle essential oils is great for increasing mental clarity and is strong enough that just a drop gives me a concentration boost throughout the day.
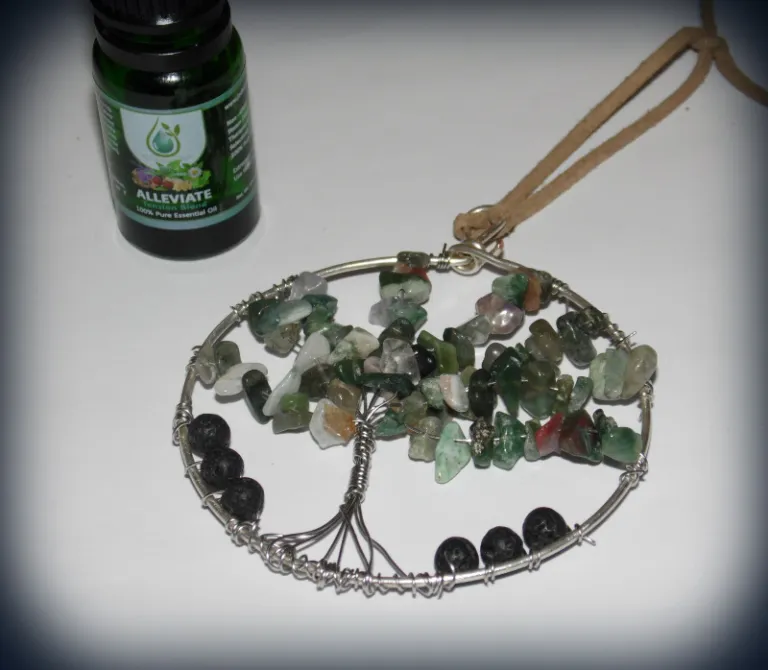
Those pine tree car air fresheners might get the job done, but they don’t look very pretty. Why not make a gorgeous tree of life air freshener for your car that can be personalized with your favorite essential oils?
Decide how large you’d like your air freshener to be. My project measures three inches across, but you can make yours whatever size you’d like. Cut your 16 gauge wire and bend it into a circle. (If you are having trouble making a neat circle, wrap the wire around a sturdy glass or another round object.)
To make the hanging loop at the top, bend one of the wires at a 90-degree angle, create a loop, and wrap the loose wire around the base. Trim as needed, then bend the ends down with your pliers so they aren’t sticking up.
Take a long piece of 24 gauge wire and fold it in half. With the bend at the bottom of your circle, wrap the wire around the circle three or four times. Wrap it as tightly as you can.
Repeat this process with three more long pieces of 24 gauge wire. When you’re done, you should have eight wire ends sticking out from the bottom of your circle.
Hold all of the wire ends together in one hand and twist them to make a tree trunk.
Separate the wires to make your tree branches, then string the gemstone chips to create leaves for the tree. Wrap the end of the wire around the circle three or four times when you’re done, then trim as needed.
Cut two small pieces of wire. String three tiny lava beads on each wire, then wrap the wire around the bottom left and right sides of your circle.
Cut and tie a length of suede cord to make a loop for hanging.
Essential Oil Suggestions
To use your air freshener, add a drop or two of essential oil to the lava beads. If you’re dealing with particularly nasty smells, you can also add a little extra oil to the suede cord.
I’ve been using Jade Bloom’s Alleviate in my air freshener, but lemon, orange, grapefruit, cinnamon, peppermint, and cedarwood are all popular choices for air fresheners.
Additional Assistance
This tutorial video shows how to make a wire-wrapped tree of life necklace pendant that is very similar to my project.


